
")
How To Use Bosch Tile Laser? (All You Need To Know)
Are you looking for How To Use Bosch Tile Laser? Yes, when it comes to home improvement projects, there are a few things more frustrating than dealing with tile. Whether you’re trying to install new tile or simply repair existing tile, the process can be difficult and time-consuming. Fortunately, there’s a tool that can make the process a whole lot easier: a bosch tile laser.
A bosch tile laser is a specialized tool that projects a laser line onto the surface of your tile. This laser line can be used as a guide for cutting, drilling, or simply installing tile. The best part is that a bosch tile laser is relatively inexpensive and easy to use.
If you’re planning on tackling a tile project in the near future, be sure to pick up a bosch tile laser. Trust us, it’ll make your life a whole lot easier.
- First, make sure that the area you will be working in is level
- You can use a laser level to do this
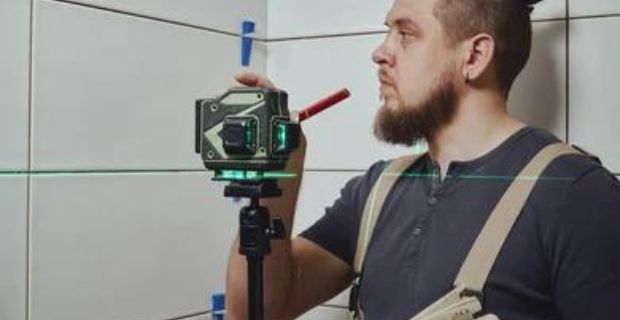
- Next, set up the tile laser in the middle of the room
- Once the laser is set up, turn it on and aim it at the wall you want to tile
- Use a pencil to mark where the laser beam hits the wall
- This will be your starting point
- From there, begin tiling the wall from the bottom up
- Make sure each tile is level with the one next to it
- Once the entire wall is covered, turn off the laser and clean up any pencil marks
How Do You Use A Laser Level Tile?
Assuming you would like tips on how to use a laser level for tiling: One of the most important aspects of the tiling is making sure your tiles are level. A great way to ensure this is by using a laser level.
Here are some tips on how to use a laser level for tiling: First, before you even start tiling, make sure you have a level surface to work with. If your surface is not level, your tiles will not be level either, no matter how level you make them with your laser level.
Next, when you are ready to start tiling, set up your laser level in a location where it will not be in the way of your work area. Once it is set up, turn it on and adjust the level until the laser beam is level. Now, starting at one end of your surface, place a tile on the adhesive and then use your laser level to make sure it is level.
You can do this by holding the level against the tile and making sure the laser beam is lined up with the tile’s edge. If the tile is not level, adjust it until it is. Continue placing and leveling tiles until your surface is complete.
Once all the tiles are in place, turn off your laser level and clean up your work area. By following these tips, you can be sure that your tiles will be level, giving you a professional-looking finish.
How Do You Use A Laser Level Floor?
A laser level floor is a tool that projects a horizontal or vertical line of laser light onto a surface. This tool is used to create a level or plumb lines on floors, ceilings, and walls. There are many different types of laser-level floors on the market.
Some laser-level floors are self-leveling, while others require manual leveling. Most laser-level floors have a level vial that can be used to ensure the laser is level. To use a laser-level floor, first, make sure the laser is level.
Next, take the laser level floor and place it on the floor. The laser light will project onto the floor. Move the laser-level floor around until the line of light is where you want it.
Once the line of light is in the desired location, use a tape measure to measure the distance from the laser-level floor to the wall or other surface. This measurement will tell you how to level the floor. Laser-level floors are a great tool for creating level or plumb lines on floors, ceilings, and walls.
When using a laser-level floor, make sure the laser is level and then measure the distance from the laser-level floor to the wall or other surface to determine the level of the floor.
How Do You Square A Room With A Laser?
If you want to square a room using a laser, there are a few things you need to do. First, you need to find the center of the room. To do this, you can measure the length and width of the room and divide it by two.
Once you have the center of the room, you need to find the center of each wall. To do this, you can measure the length of the wall and divide it by two. Once you have the centers of the walls, you need to draw a line from the center of each wall to the center of the room.
This will create a cross in the center of the room. Next, you need to find the midpoint of each line. To do this, you can measure the length of each line and divide it by two.
Once you have the midpoints of the lines, you need to draw a line from the midpoint of each line to the center of the room. This will create a square in the center of the room. Finally, you need to find the corners of the square.
To do this, you can measure the length of each line and divide by four. Once you have the corners of the square, you need to draw a line from the corner of the square to the center of the room. This will create a cross in the center of the room.
How Do You Square A Building With A Laser?
If you want to square a building with a laser, you need to use a theodolite. A theodolite is an instrument that is used to measure angles in the horizontal and vertical planes. You can use a theodolite to take measurements of the corners of a building, and then use the laser to create a square.
Bosch Plt2 Tile Laser Level
If you’re looking for an easy and accurate way to level tile, the Bosch PLT2 tile laser level is a great choice. This laser level projects a horizontal or vertical line onto any surface, making it easy to see where your tile needs to be level. The Bosch PLT2 has a self-leveling feature that keeps the laser level even if the surface isn’t perfectly level.
This tile laser level also has a built-in plumb point, so you can easily see where your tile needs to be placed in relation to the rest of the room. The Bosch PLT2 is a great choice for anyone who wants to level tile quickly and easily.
Tile Layout Laser
If you’re planning a tile job, chances are you’re going to need a tile layout laser. These handy tools help you lay out your tile in perfectly straight lines, making your job much easier. Here’s everything you need to know about tile layout lasers.
Tile layout lasers are available in a few different styles. The most popular type is the rotary laser, which emits a laser beam in a circular pattern. This is great for large tile jobs, as you can easily see the laser beam rotating around the room.
Another type of tile layout laser is the line laser. This emits a laser beam in a straight line, which is perfect for smaller tile jobs. Line lasers are usually more affordable than rotary lasers, so they’re a great option if you’re on a budget.
When shopping for a tile layout laser, be sure to pay attention to the accuracy. The higher the accuracy, the straighter your lines will be. Most tile layout lasers have an accuracy of +/- 0.3mm, which is more than enough for most tile jobs.
If you’re looking for a tile layout laser, be sure to check out our selection. We carry a variety of laser levels, including rotary lasers and line lasers.
Best Laser Level For Tiling Walls
Are you looking for the best laser level for tiling walls? If so, you’ve come to the right place! In this blog post, we’ll provide detailed information about the best laser levels for tiling walls, so you can make an informed decision about which one is right for you.
There are a few things to consider when choosing a laser level for tiling walls.
First, you’ll want to make sure that the laser level is accurate. This is important because you want your tiles to be level and even.
Second, you’ll want to consider the size of the laser level. If you’re tiling a large area, you’ll want a laser level that is large enough to cover the entire area.
Third, you’ll want to consider the price. Laser levels can range in price, so you’ll want to find one that fits your budget.
Fourth, you’ll want to make sure the laser level is easy to use. You don’t want to be struggling to figure out how to use the laser level while you’re trying to tile your walls.
Fifth, you’ll want to make sure the laser level comes with a warranty. This is important in case anything happens to the laser level while you’re using it.
Now that you know what to look for in a laser level for tiling walls, you can start shopping around for the perfect one for you.
Bosch Gtl2
Bosch gtl2 is a tool that allows you to create a variety of different designs with your photos. You can use it to create photo montages, photo books, and event calendars. This tool is very user-friendly and comes with a variety of different templates to choose from.
You can also upload your own photos and use them in your designs. Bosch gtl2 is a great tool for anyone who wants to be creative with their photos.
Bosch Gtl3
Bosch gtl3 is a high-quality, professional-grade laser level that is perfect for a variety of applications, including leveling cabinets, floors, walls, and more. This laser level features a self-leveling horizontal and vertical laser beam, making it easy to use and ensuring accuracy. Additionally, the Bosch gtl3 has a large, easy-to-read LCD screen that displays leveling results in real-time, making it easy to make corrections on the fly.
Bosch Power Tools – GTL3 Tile Layout Laser Product Video
Floor And Wall Tile Laser Level
Whether you’re a professional contractor or a DIYer, tiling can be a tricky business. Even the most experienced tile setters can have a hard time getting tile to line up perfectly, especially when working on larger projects. That’s where a laser level comes in handy.
A laser level is a tool that projects a horizontal or vertical line of laser light. This line can be used as a reference point for laying tiles. Laser levels make it easy to get a precise measurement, so you can be sure your tile is evenly spaced and level.
There are different types of laser levels available, depending on your needs. For example, some laser levels can be mounted on a tripod, while others can be attached directly to the tile itself. There are also laser levels that can project both horizontal and vertical lines, which can be helpful for more complex tiling projects.
If you’re planning on doing any tiling in the near future, a laser level is a tool that can make the job a whole lot easier.
Best Tile Laser Level
If you’re looking for the best tile laser level, you’ve come to the right place. In this post, we’ll go over everything you need to know about tile laser levels, including what to look for when shopping for one and our top picks. When shopping for a tile laser level, there are a few things to keep in mind.
First, you’ll want to make sure that the level is able to emit a laser beam that is visible on both dark and light surfaces. Second, you’ll want to make sure that the level has a large enough working range for your needs. And finally, you’ll want to make sure that the level is accurate to within 1/8 inch.
Our top pick for the best tile laser level is the Bosch GLL 2-45. This level has all of the features we mentioned above, and it also includes a handy carrying case and a magnetic mount for easy attachment to metal surfaces.
Bosch Gtl3 Review
Bosch’s GTL3 is a high-end tile laser that is designed for both professional and DIY users. It features a large, easy-to-read LCD screen and three easy-to-use buttons that make it simple to operate. The GTL3 also has a built-in memory function that allows you to store up to four different jobs.
The GTL3 is very accurate and has a range of up to 100 feet. It comes with a carrying case, a tripod, and a target plate. The laser is also very easy to set up and use.
The only downside to the GTL3 is that it is a bit pricey. However, if you are looking for a high-quality tile laser, the Bosch GTL3 is a great option.
Conclusion of How To Use Bosch Tile Laser?
Bosch tile lasers are a great way to get precise, level lines when tiling. Here’s how to use one:
First, set up the laser by placing it on a tripod or other stable surface.
Make sure the laser is level, then turn it on.
Next, position the tile you want to install on the wall or floor. Use a level to make sure it’s level, then mark the top and bottom of the tile with a pencil.
Now, align the laser beam with the marks you just made. Use the level to make sure the beam is level, then adjust the laser’s focus so the beam is as narrow as possible.
Finally, start tiling!
Install the first tile at the top of the area you’re tiling, then work your way down, using the laser beam to guide you. Install each tile so that it’s level with the one next to it, using the laser beam to check your progress as you go.